Contact SIMETRY Support
Our support team is available 24/7 to assist you with any cellular connectivity issues.
- You can email us via support@simetry.com.
- Call us at at 1-833-746-3879.
- Contact your dedicated account manager.
Device Information
- Manufacturer: CSG
- Model: m519
Component Overview

*Please note that the OEM antennas have been replaced to minimize the length and improve signal quality.
Power on
After attaching the antennas, simply press the power button. When powered up, your m519 router will broadcast both 2.4GHz and 5GHz Wi-Fi signals with the SSID.

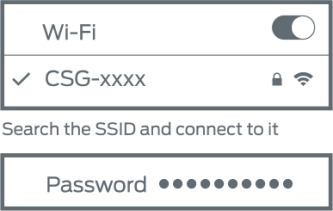
Connecting to the m519
Connect to the Wi-Fi called CSG-xxxxand CSG-xxxx5G where xxxx is the last four digits of the device's serial number, and then input the default Wi-Fi password which is the last 8 digits of the serial number and is also printed on the bottom label of the router.
You can also plug an ethernet cable from your computer to the LAN port located on the back of the router.

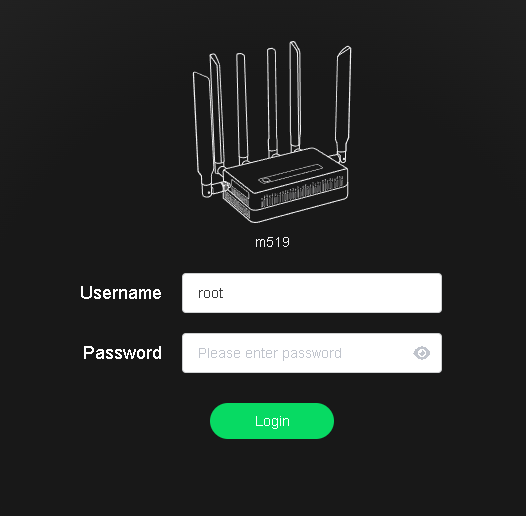
Accessing the web administrator page
While connected to your router, visit https://192.168.8.1 in your browser to access advanced settings and configuration icons.

Your login credentials are unique to each router and can be changed after your initial login.
- Username: root
- Password: Located at the bottom of the device
Changing SIM slots and APNs
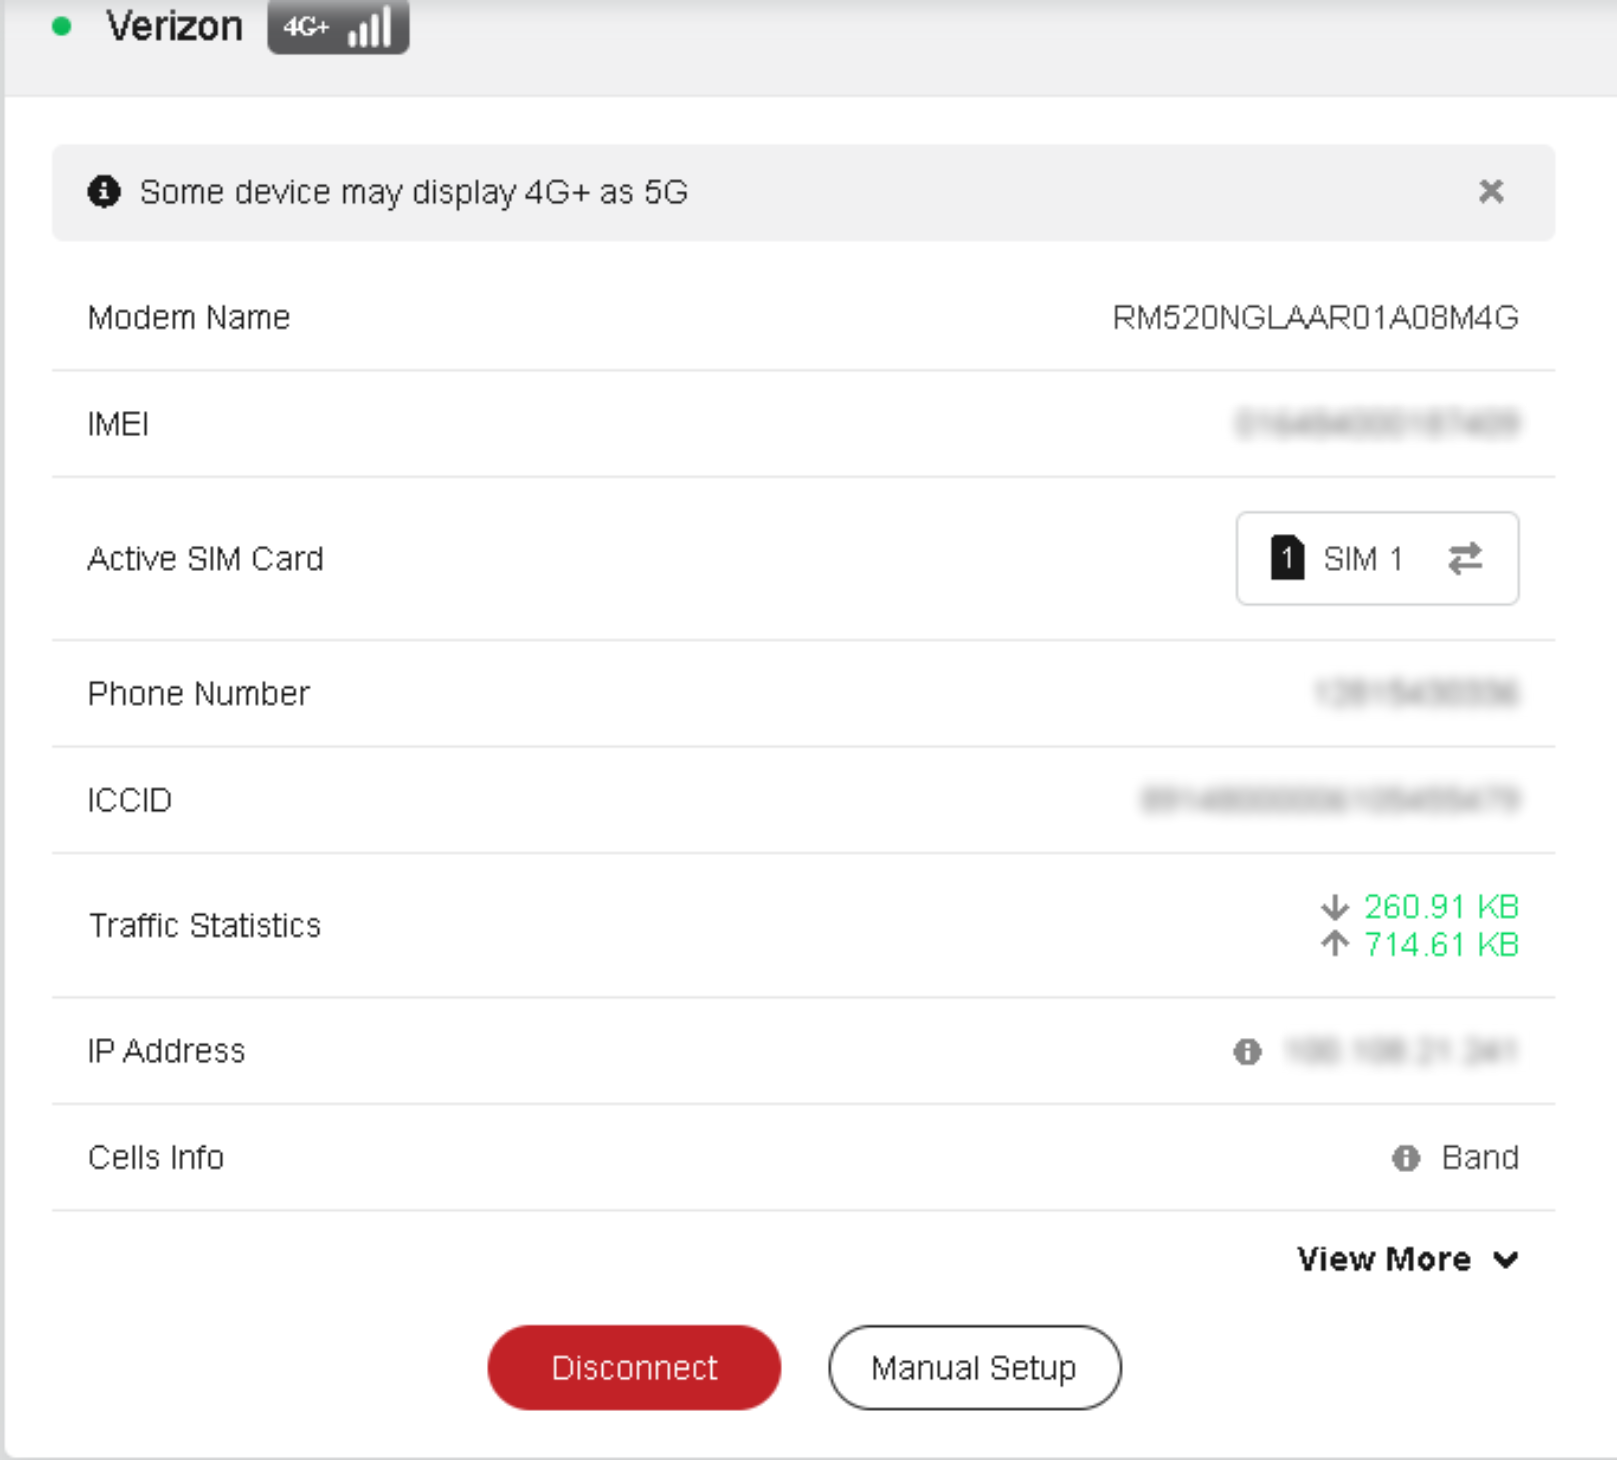
In this example, the m519 has already been pre-provisioned with a Verizon nano-SIM in slot 1 and an AT&T nano-SIM in slot 2. The APNs have been pre-programmed onto the device for your convenience. This will ensure that the router connects to a carrier as soon as the device is powered on.
The m519 was also pre-configured to utilize cellular failover with the preferred SIM being slot 1. You have the option to turn this feature off if needed or change these settings to your preference.

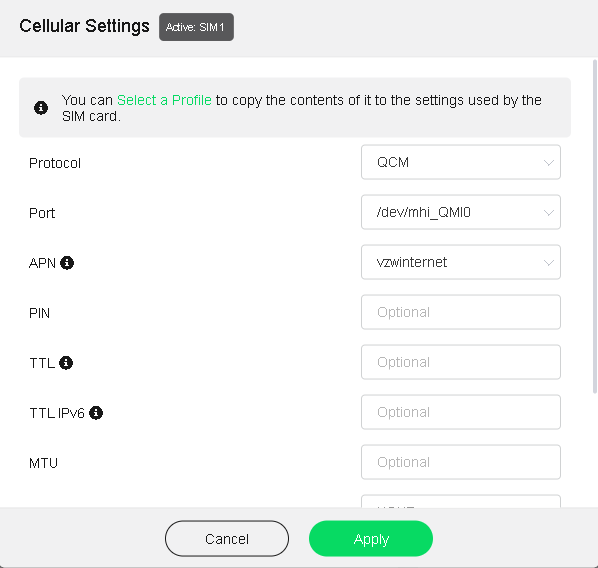
You can manually change the active SIM slot by navigating to Internet -> Active SIM Card.
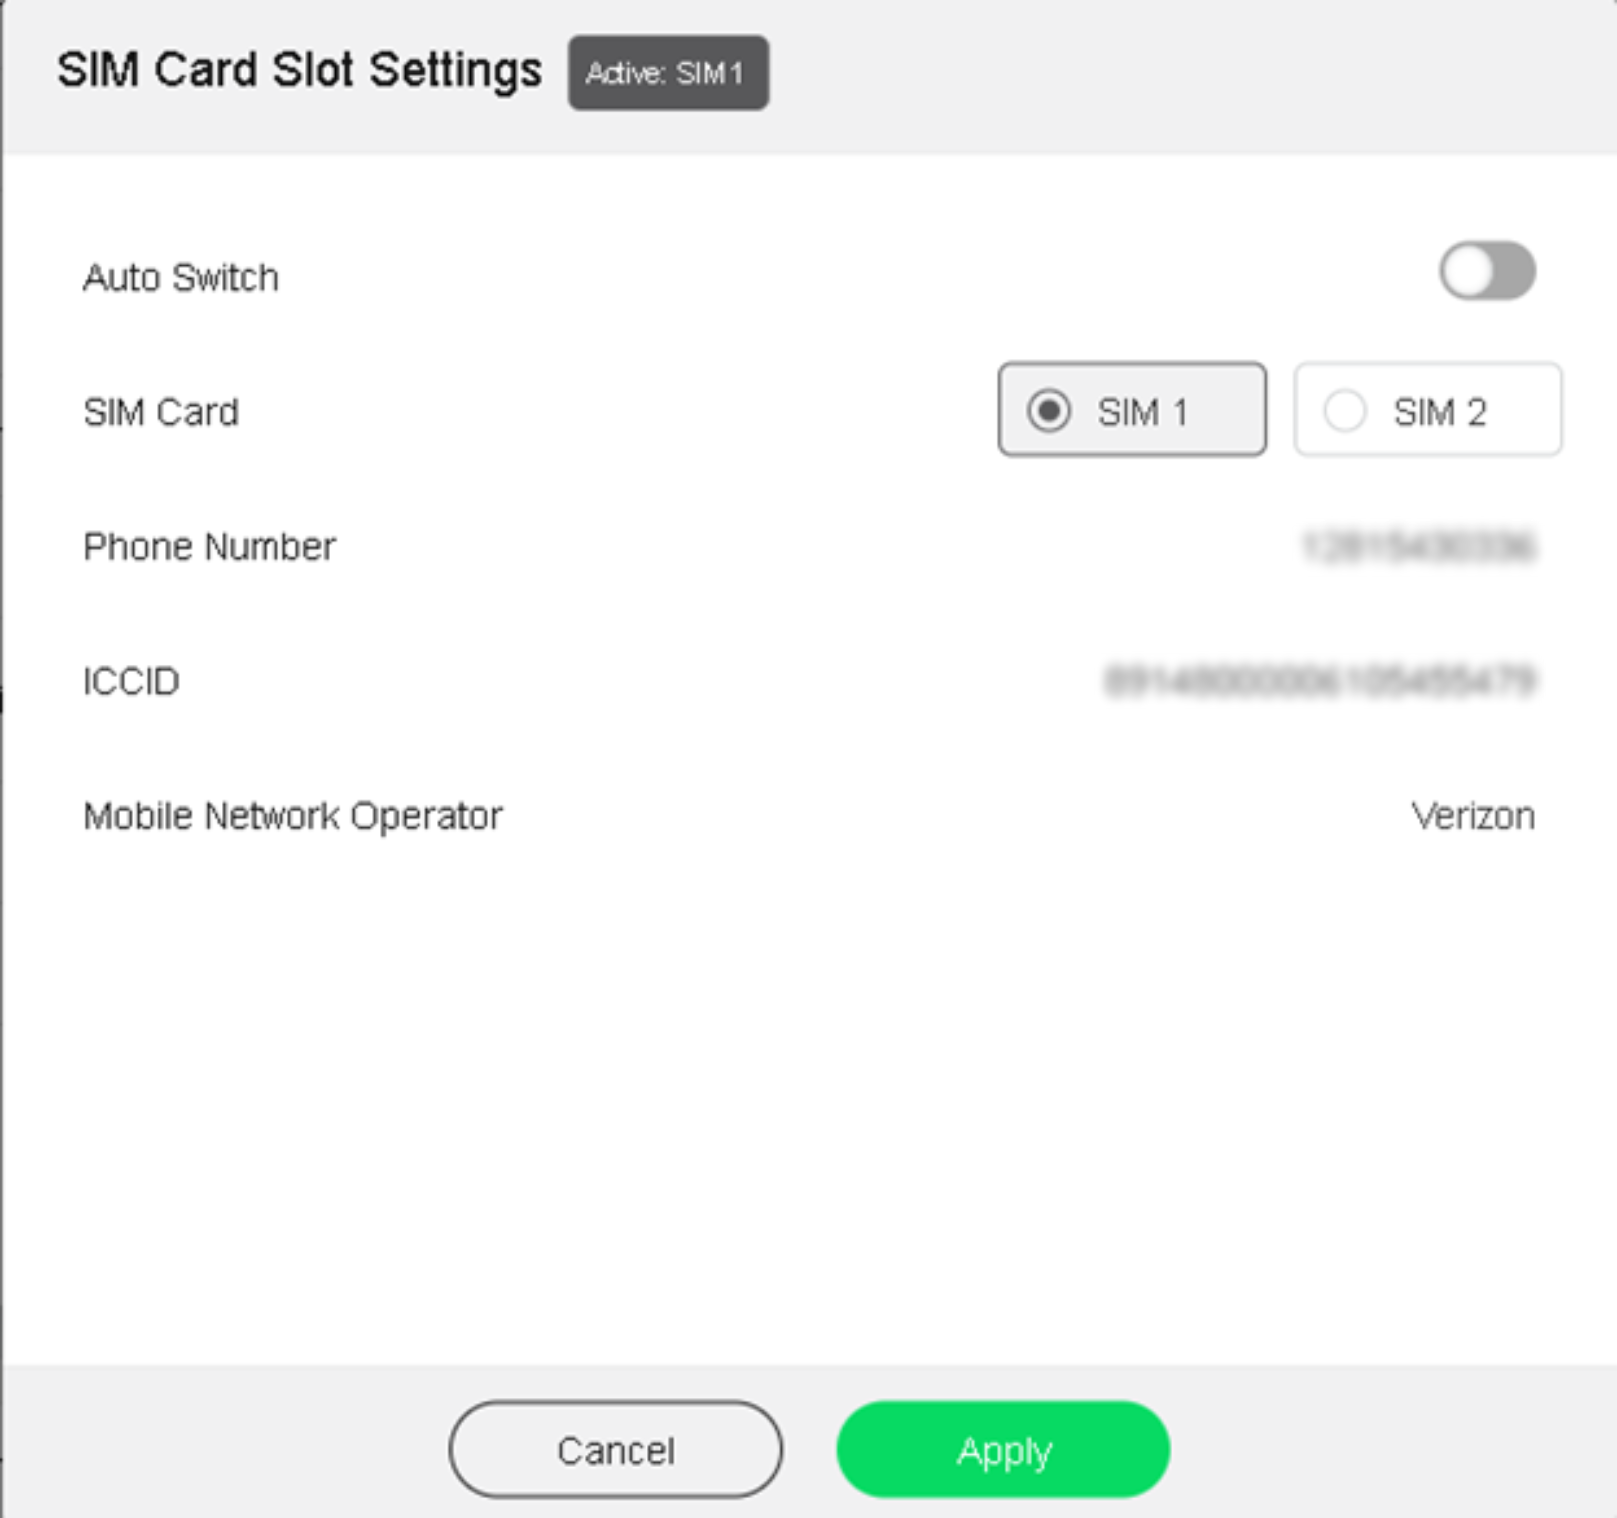
*Please note that you will need to disable the cellular failover feature by toggling off Auto Switch.
In this example, let's say that you wish to change one of the SIMs out for the T-Mobile SIM, you will need to follow the steps below.
- Contact SIMETRY support to activate the SIM card.
- Power the device off and replace the SIM in the desired slot.
- Power the device on and log into the web administrator page.
- Change the active SIM slot to the slot that you have replaced with the T-Mobile SIM.
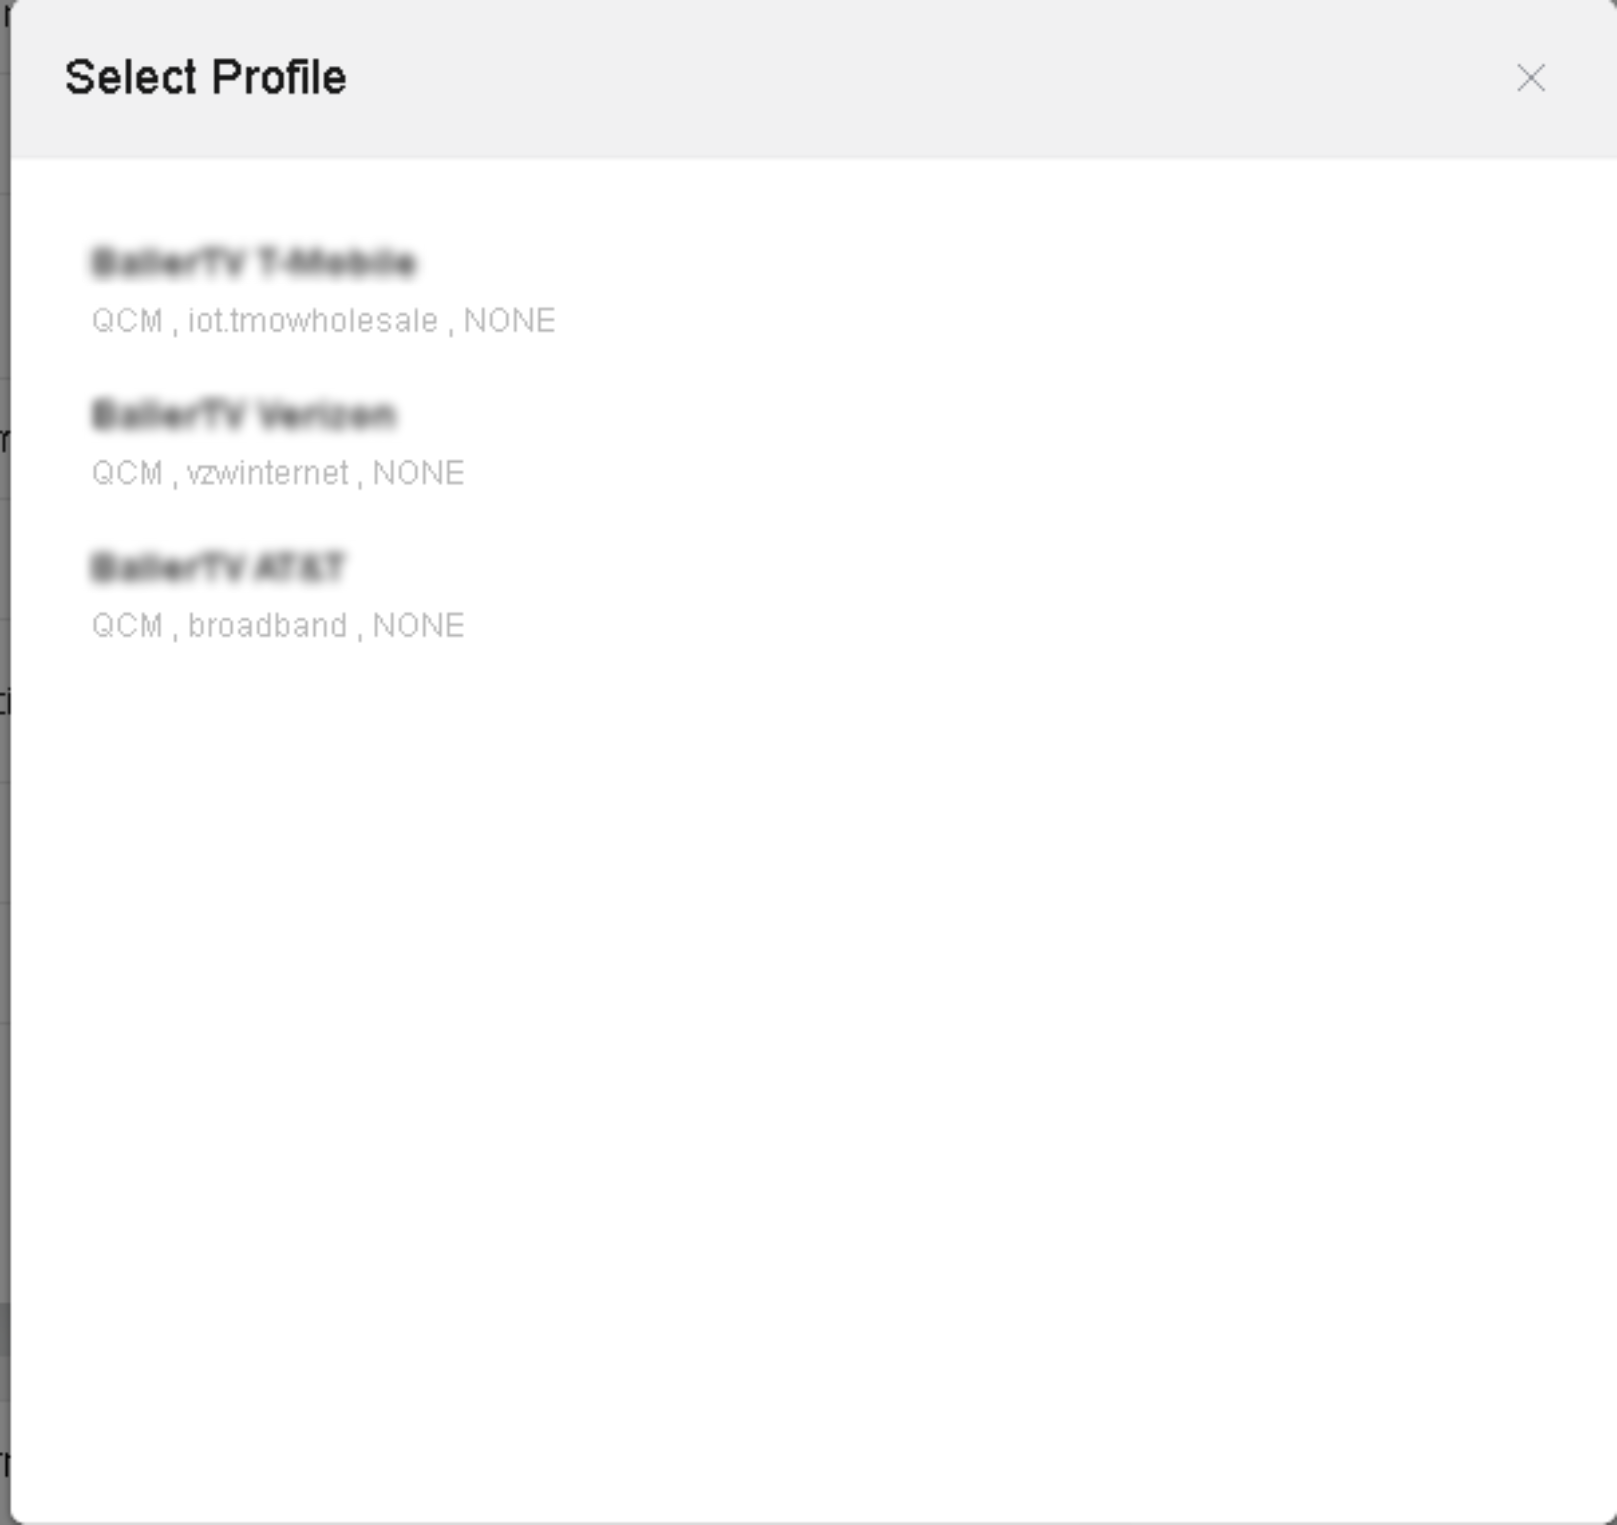
- Use manual setup and change the APN by using a manually created profile.
- Save and apply the changed settings.
Once completed, the router will attempt to connect to T-Mobile’s network. You will then see that the status has changed to green and your LED indicator for the internet will light up as well.
Cloud management
The m519 can be managed through a cloud environment via https://www.goodcloud.xyz/#/login.
Features
- Check live router status.
- Live online offline status check.
- Live RAM and Load Average check.
- LTE Signal
- Email alarm about online or offline status updates.
- Set up routers remotely.
- Set up routers (e.g. SSID and Key) remotely.
- Remote SSH.
- Remote access web Admin Panel.
- Monitoring clients on routers remotely.
- Check who is on your network.
- Real-time traffic monitoring and block clients.
- Email alarm about new client and block.
- Operate routers in batch.
- Set up config templates and configure routers in batch.
- Reboot or upgrade routers in batch
- Manage routers in groups.
- Divide devices into different groups.
- Manage devices on one page.
- Site to Site (Examples below)
- Virtual Office: extend your office network to other offices.
- Business Travel: remote access office's OA, CRM, MySQL systems
- Smart Home: remote access IP camera, NAS, and other devices at home.
*Please note that any critical changes (i.e. SIM slot changes, APN changes, etc.) could result in the device going offline. Please take extra precautions when working with a modem remotely.
To utilize the portal, please make sure that you create an account. Once completed, you will need to provide the email that you registered under to SIMETRY. We will share the modem with your account so that you can manage the device. Alternatively, we can release the modem to you for complete management.
Enable Cloud Management
While we have taken the liberty of enabling the cloud management feature, you can also learn how to enable this feature below. All you will need is the information found on your device here.

Add device
On the left side -> Devices List -> Add Device. There are three methods to bind devices to GoodCloud, Auto discover, Manually add, and Bulk import.

Auto discover
If the router and PC (which opened goodcloud.xyz page) are at the same public IP, it will be automatically discovered and can be found when you click “Device list”. The device ID can be located on the back of the router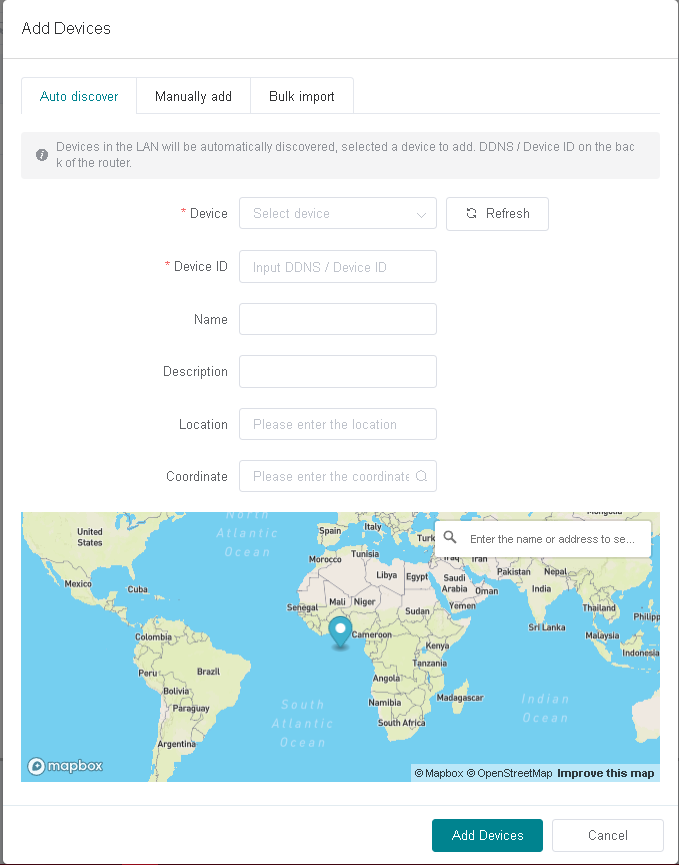
Manually add
You can manually enter the device information into the required fields if you do not have the device connected locally.

Bulk import
Bulk import is for users who have a great number of devices to add. By Bulk import, you can import many devices by a Microsoft Excel file.
Devices info and status
On the left side -> Devices -> Bound Devices or Shared Devices

There is an icon in the first column of this table,
![]() means this device is online.
means this device is online.
![]() means this device is offline.
means this device is offline.
- means this device is deactivated, it has never connected to GoodCloud before.
You can select the columns that you want displayed.

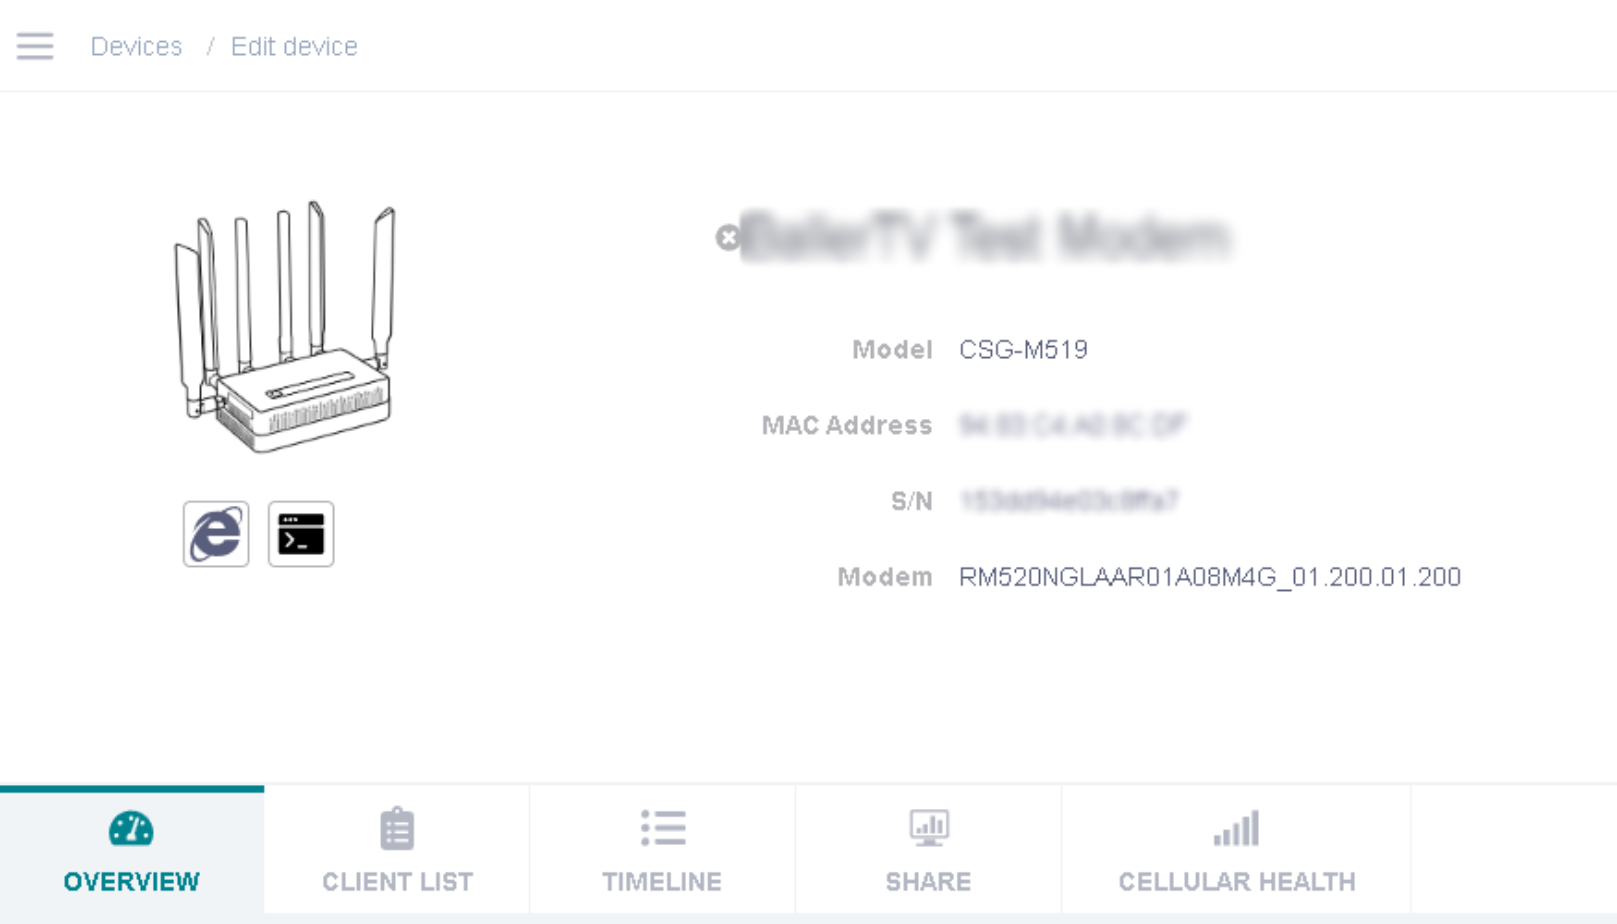
Device detail information
On the left side -> Device List, click the name of an online device. This will open a page to manage the device’s Wi-Fi, clients, view router info, memory usage, uptime, load average, and logs.
Remote access web administrator page
Select this Icon to remotely log into the router’s web administrator page.

Remote access the router's terminal
Select this icon to remotely access the router's terminal.
Other features
This platform has many other features to choose from. There are detailed guides that are available by selecting the icon below. This icon will redirect you to the following link https://docs.gl-inet.com/router/en/3/tutorials/cloud/#introduction.

Need more help?
Please feel free to contact our support team. As we have done extensive testing, we will be more than happy to answer any questions or concerns that you may have. We are also available to troubleshoot in the even that you run into any issues.
Was this article helpful?
That’s Great!
Thank you for your feedback
Sorry! We couldn't be helpful
Thank you for your feedback
Feedback sent
We appreciate your effort and will try to fix the article