Integrating a Peplink router with Starlink enhances internet connectivity by combining satellite and cellular networks, ensuring a more reliable and seamless online experience.
Note: The specific steps may vary depending on your Peplink router model and firmware version.
1. Physical Setup
Connect Starlink to Peplink:
- Use an Ethernet cable to connect the Starlink terminal to a WAN port on your Peplink router.
Power Considerations:
- Ensure both devices are properly powered.
- For mobile installations, consider power requirements and the potential need for inverters or DC power solutions.
2. Peplink WAN Configuration
Access Peplink Web Admin Interface:
- Open a web browser and navigate to the Peplink router's IP address (commonly
192.168.50.1). - Log in with your admin credentials.
- Alternatively, you can remote web admin into the device using InControl2.
- Open a web browser and navigate to the Peplink router's IP address (commonly
Configure WAN Settings:
- Navigate to Network > WAN.
- Select the WAN port connected to Starlink.
- Set Connection Method to
DHCP. - (Optional) Manually specify DNS servers, such as
8.8.8.8and1.1.1.1. - Enable Health Check using the PING method to monitor connection stability.
Save and Apply Settings:
- Click Save and then Apply Changes to update the configuration.
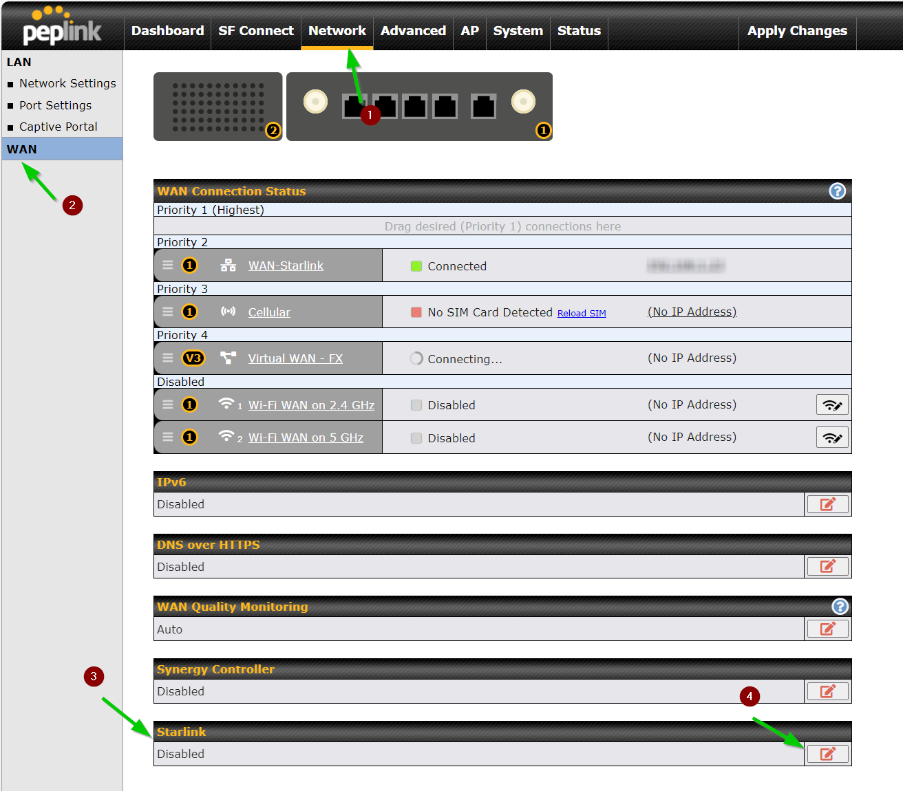


3. Prioritize WAN Connections
Set Connection Priorities:
- In the Dashboard, drag and drop WAN connections to set their priority order.
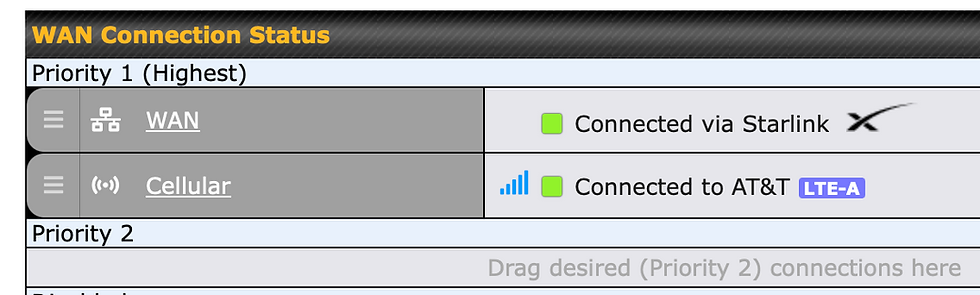
- Place Starlink in Priority 1 for primary use, with cellular connections as backups.
Configure Failover Settings:
- Ensure that Failover is enabled to automatically switch to backup connections if Starlink becomes unavailable.
4. Advanced Configuration (Optional)
Outbound Policy:
- Navigate to Network > Outbound Policy.
- Set rules to direct specific traffic types through preferred WAN connections.
SpeedFusion Setup:
- If your Peplink device supports SpeedFusion, configure it to bond multiple WAN connections for enhanced performance and reliability.
5. Monitoring and Maintenance
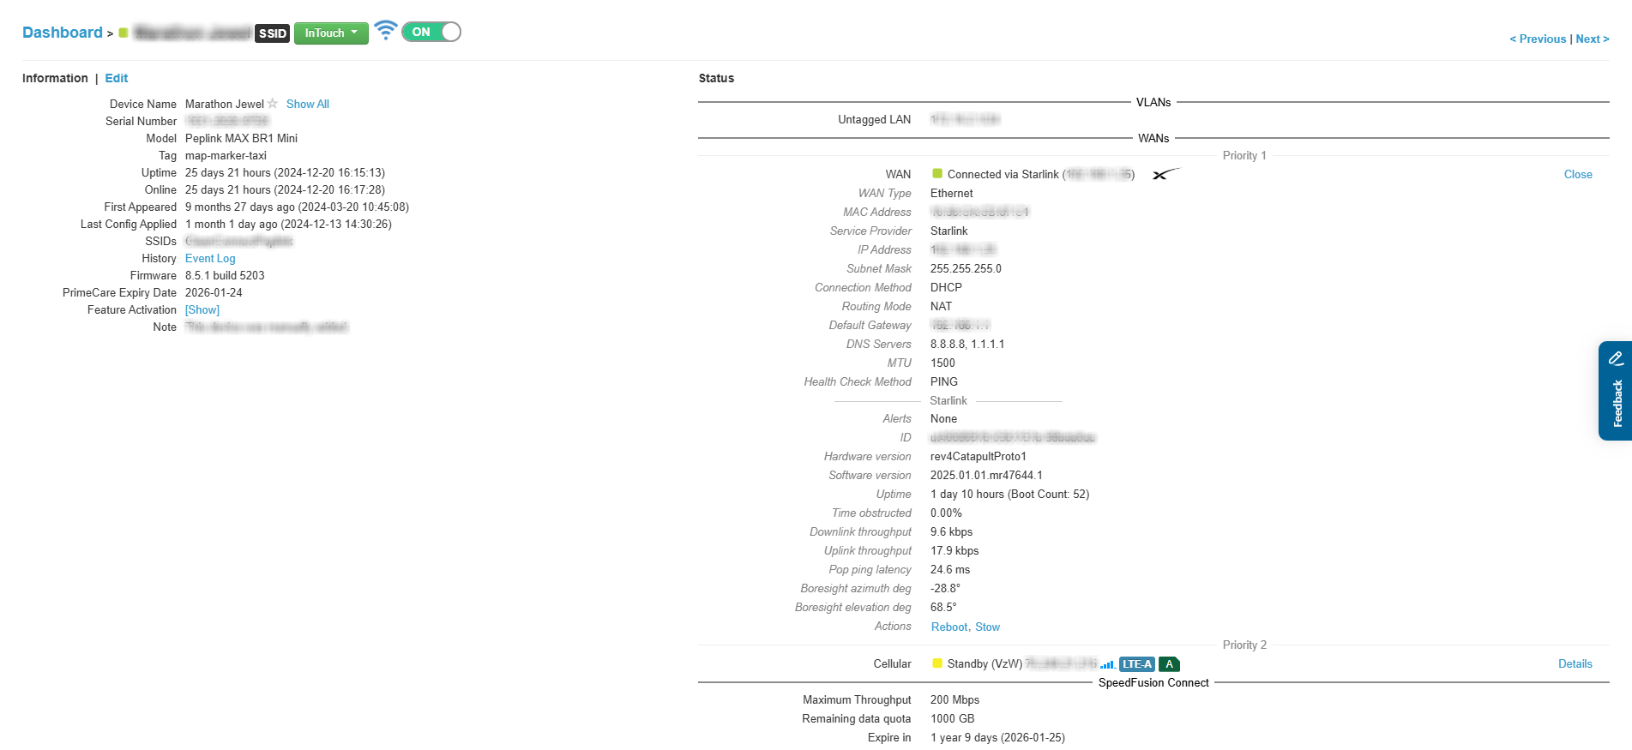
Monitor Connection Status:
- Use the Status tab to view real-time information on WAN connections.
Firmware Updates:
- Regularly check for and apply firmware updates to ensure optimal performance and security.
6. Allow access to GPS location data on the local network
Open the Starlink App:
- Launch the Starlink app on your mobile device.
Select your Starlink unit:
- Choose the Starlink that you will be working with.
Access Advanced Options:
- In the Settings menu, select Advanced.
Go to Debug Data:
- Under Advanced, locate and tap on Debug Data.
Find the Starlink Location Section:
- Scroll down to the Starlink Location section.
Enable Local Network Access:
- Toggle the Allow Access on Local Network switch to the On position.
Verify the Change:
- Confirm that the toggle remains enabled. This will allow devices on your local network to access your Starlink dish's GPS location data.


Additional Resources
Peplink's Starlink Integration Guide: Provides detailed instructions and considerations for integrating Starlink with Peplink devices. Link
SeaBits Guide on Using Starlink with Peplink: Offers insights and practical advice on combining these technologies for enhanced connectivity. Link
MobileMustHave's Peplink and Starlink Integration: Features setup videos and wiring diagrams for various configurations. Link
Webinar on Linking up Starlink with Peplink: A visual demonstration of the integration process. Link
West Networks Starlink Configuration Walkthrough: A visual demonstration of the configuration process. Link
5G Store Starlink Configuration Walkthrough: A visual demonstration of the configuration process. Link
By following this guide, you can effectively integrate your Peplink router with Starlink, creating a robust and reliable internet setup suitable for various applications, including remote work and mobile connectivity.
Was this article helpful?
That’s Great!
Thank you for your feedback
Sorry! We couldn't be helpful
Thank you for your feedback
Feedback sent
We appreciate your effort and will try to fix the article