PURPOSE
To enable customers and Simetry field personnel to complete a self-installation of a Starlink Standard system.
INSTRUCTIONS
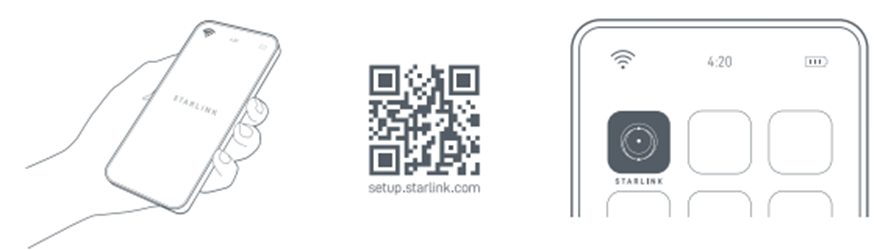
- Download the Starlink App: Scan the QR code.
- Unbox and Setup System:
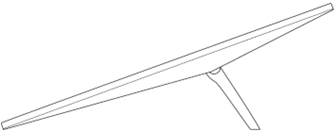
- Starlink system includes the antenna with kickstand, 15m antenna cable, Gen3 WiFi 6 router, and 1.5m AC power cable with power supply unit. Lift the kickstand and plug one end of the antenna cables into your Starlink with the cable locking feature facing up. Ensure the plug is fully inserted such that the plug face is flush with the surface. To remove cable, pull firmly outward as there is no release tab.
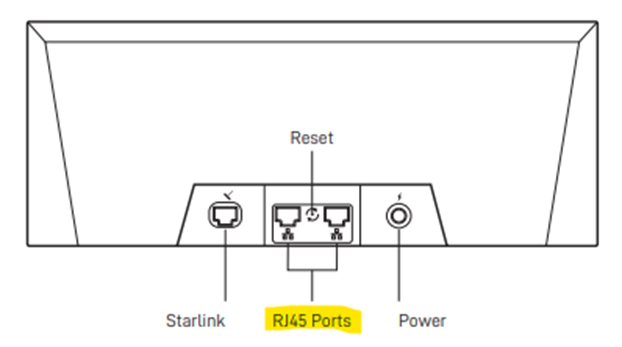
- Route the other end of the Starlink cable to your Router and plug it into the port number 1 indicated with the antenna symbol on the back of the router.
- Plug the Gen 3 Router into a power outlet using the power cable and power supply.

- Find a clear view of the sky:
- Open the App and follow the prompts to allow App to use your phone’s location and Camera. In the App, use the “Check for Obstructions” tool to find an install location with minimal obstructions that will deliver the best service. For best results, Starlink should be install on a flat surface. If you are unable to download the App, find a location outdoor that is flat and has minimal obstructions to view the sky:

- Open the App and follow the prompts to allow App to use your phone’s location and Camera. In the App, use the “Check for Obstructions” tool to find an install location with minimal obstructions that will deliver the best service. For best results, Starlink should be install on a flat surface. If you are unable to download the App, find a location outdoor that is flat and has minimal obstructions to view the sky:
- Get Connected:
- Connect to the “STARLINK” network from your device WiFi settings. STARLINK is the router’s default WIFI network name (SSID).
- To secure your Starlink WiFi network, use the Starlink App to rename your Starlink WiFi network and create a WiFi password. Open the Starlink App > Settings > Router > enter desired WiFi network name and password > Save.
This step is optional, however we recommend securing your WiFi network. Your Starlink WiFi network is not password protected until you set the password.
- Align Starlink
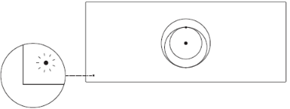
- Once connected, an alert on the App will show if you need to rotate Starlink to be properly aligned. Click the alert to use the alignment tool, and adjust your kit to match the image on your device.
- Alignment is not required for mobility use, but does optimize performance for permanent installations.
- As long as the Starlink dish has minimal obstructions, you are now connected to the internet!
- Service Line Activation
- For ease of product support, Simetry assigns each purchased Starlink kit an asset number, STL-xxxx. Locate your kit’s Simetry asset # and contact our 24/7 helpdesk for activation:
- phone: 1-833-746-3879
- email: support@simetry.com
- Simetry will process an activation within minutes of any request. Once activation has been completed, reboot your Starlink kit and service will commence.
- For ease of product support, Simetry assigns each purchased Starlink kit an asset number, STL-xxxx. Locate your kit’s Simetry asset # and contact our 24/7 helpdesk for activation:
- Can’t get online?
- Use the Starlink app to check for any alerts, outages, or obstructions.
- Check the WiFi router light:
- Flashing White Light: trying to connect; will turn solid if connected or red in no internet within 20 minutes
- Solid White Light: connected, turns off after 1 hr
- No Light: no power to router
- Red Light: no internet connection
- Violet Light: Router is in bypass mode; factory reset is required to exit Bypass mode
- Make sure the cables are securely plugged in and there’s no damage or kinks.
- Power cycle the router by unplugging it, plugging it back in, then start at step 4.
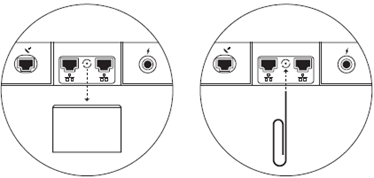
- Factory reset the router by pushing the reset button with a paper clip.
- If you are still unable to connect to the internet, locate the system asset # and contact Simetry’s 24/7 helpdesk for further guidance:
- phone: 1-833-746-3879
- email: support@simetry.com
- What is Bypass Mode?
- Bypass mode allows you turn off the Starlink router and connect a third-party router directly to Starlink. When bypass mode is activated, the Starlink router’s WiFi features are completely disabled. You can enable bypass mode in the Starlink app under “Settings.” To disable bypass mode, you can perform a factory reset.
- Using the Extra RJ45 Ports
- Remove the RJ45 cover on the back of the Starlink router and plug in your own ethernet cable to port 1 or 2. Connect the other end of your cable to your third-party hardware.
- Remove the RJ45 cover on the back of the Starlink router and plug in your own ethernet cable to port 1 or 2. Connect the other end of your cable to your third-party hardware.
Was this article helpful?
That’s Great!
Thank you for your feedback
Sorry! We couldn't be helpful
Thank you for your feedback
Feedback sent
We appreciate your effort and will try to fix the article